Ever wondered why glass items don’t break during shipping? The secret lies not just in the glass’s strength but also in the way it’s packaged.
With years of expertise in ensuring the safe transit of fragile items, I bring a blend of industry-standard practices and innovative strategies to the table.
Packing glass for shipping is an art that balances delicacy with durability, requiring attention to detail and an understanding of material science.
In this ultimate guide, we will unveil the distinctions between packing materials, techniques, and strategies to ensure every glass item arrives in pristine condition every time.
Read on to master the skill of packing glass like a pro.
Step#1 Setting Up the Automated Packing Machine
Here’s the first process where it is crucial for businesses aiming to streamline their packaging operations, enhancing efficiency and reducing the risk of damage during transit. Let’s break down the details:
Choosing the Right Machine for Your Needs
Start with selecting an appropriate automated packing machine is the foundation of an efficient packing process. Factors like the size and volume of glass products, the scale of operations, and specific packing needs dictate the choice. As per Statista, the global market value of glass packaging is expected to rise by approximately 88.3 billion U.S. dollars in 2032. It is best to opt for a machine with user-friendly interfaces.
Installation and Calibration
Once the right machine is chosen, the next step is proper installation and calibration. This involves setting up the machine in a designated area with enough space for operation and maintenance. Calibration is essential to ensure that the machine packs each glass item securely and consistently. This process typically involves adjusting the pressure settings, aligning the packing materials feed, and testing with a few samples.
Training Staff and Implementing Safety Protocols
Lastly, training staff on how to operate the packing machine efficiently and safely is essential. This training should cover everything from basic operations to troubleshooting common issues. Implementing safety protocols prevents accidents and ensures the longevity of the machine. Regular maintenance checks and keeping the work area clean and organized further contribute to the safe operation of the packing machine.

Step#2 Preparing Glass Items for Machine Packing
Transitioning from setting up the automated packing machine, the next step is the preparation of glass items for machine packing. Let’s see how to effectively do this:
Inspecting and Cleaning the Glass Items
Before packing, each glass item should undergo a thorough inspection. Look for any imperfections or weaknesses that could compromise the item during transit. In my experience, even minor flaws can lead to significant damage if not addressed. Clean glass not only presents well but also adheres better to protective materials, a practice consistently upheld by brands like Glassays to maintain product quality.
Applying Initial Protective Layers
The next step involves wrapping each glass item in a protective layer. This can be a soft, cushioning material like foamy fabric or bubble wrap. The key here is to cover every part of the item without adding excessive bulk, which could complicate the machine packing process. It is important to understand that this balance is crucial as it ensures both safety and efficiency during packing.
Organizing and Staging for Machine Packing
Finally, organize the prepared glass items for seamless integration into the machine packing process. Proper organization not only streamlines the packing process but also minimizes handling, reducing the risk of damage. It’s a practice I’ve always emphasized, as it significantly enhances the overall efficiency and effectiveness of the packing operation.

Step#3 Feeding Glass Items into the Machine
After preparing the glass items for packing, the next crucial step is feeding them into the machine. Here are the key steps involved in feeding glass items into the packing machine:
Aligning Items on the Conveyor
At Glassays we ensure each glass item is correctly aligned on the conveyor belt. This alignment is crucial for the machine to pack each item effectively. In my experience, a misaligned item can cause disruptions, potentially leading to damage or a halt in the packing process. For example, a glass vase should be positioned upright with enough space around it to avoid contact with other items.
Adjusting Machine Settings for Each Item
Before starting the machine, adjusting the settings to suit the specific type of glass item being packed is essential. This includes setting the appropriate speed, pressure, and wrapping material feed. When I first started using these machines, I learned that each type of glass, whether it’s a thin wine glass or a sturdy glass bowl, requires different settings for optimal packing.
Monitoring the Packing Process
Once the machine starts, it’s important to monitor the packing process closely. Keep an eye on how the machine handles each item and be ready to make adjustments if necessary. This careful observation ensures that every glass item is securely packed and ready for shipping.

Step#4 Automated Wrapping and Cushioning
Moving from carefully feeding glass items into the machine, the next essential phase is automated wrapping and cushioning. Let’s see how this automated process enhances the safety and integrity of glass items:
- Adaptive Material Selection: First, the machine intelligently selects the optimal wrapping material for each item, adapting to different shapes and fragility levels. This smart selection ensures that each piece, whether it’s a slender stemware or a robust glass vase, receives the most suitable protective wrap.
- Precision in Wrapping Technique: Then, the automated system is programmed to wrap each item with precision, ensuring complete coverage without excess material. I’ve noticed how this precision reduces waste and enhances the protection of each item.
- Adding Additional Cushioning Layers: After wrapping, additional cushioning layers are applied by the machine. These layers could be air pillows or foam inserts, providing extra protection, especially for fragile items.
- Tight Fastening and Assessment: Lastly, the machine then fastens the wrapped item, ensuring the wrapping material stays in place. An assessment by the machine or an operator ensures that each item is ready for the next stage of packing.

Step#5 Box Preparation and Insertion by the Machine
Following the automated wrapping and cushioning, the next step in the packing process is the box preparation and insertion by the machine. See the following key aspects of this process:
- Automatic Box Assembly: It begins with the machine automatically assembling the shipping boxes, folding and sealing them to the required dimensions. For example, some brands ensure their machines are capable of adjusting to different box sizes, catering to a variety of glass products.
- Box Lining for Additional Protection: Once the box is assembled, the machine adds a protective lining, such as foam or bubble sheets to the inside. This extra layer of protection, which I always recommend, safeguards the glass items against external shocks during transit.
- Precise Insertion of Wrapped Items: Then the machine carefully inserts the wrapped glass items into the prepared boxes. It’s essential to ensure that the items fit snugly, minimizing movement inside the box, a practice that has significantly reduced breakage in my experience.
| Benefit |
Description |
| Precise Insertion of Wrapped Items |
Glass shipping machines ensure precise placement of wrapped glass items into boxes, minimizing movement and reducing breakage. |
| Improved Item Fit |
Machines guarantee items fit snugly within boxes, reducing the risk of damage during transit. |
| Reduced Breakage |
The careful handling and precise insertion of items have led to a significant decrease in breakage incidents. |
| Consistent Packaging Quality |
Automation ensures uniform and consistent packaging quality for each shipment, maintaining customer satisfaction. |
| Increased Shipping Efficiency |
The efficiency of the process saves time and labor costs, resulting in improved productivity and reduced operational expenses. |
| Minimized Handling Risks |
Automation reduces the need for manual handling, decreasing the potential for employee injuries and worker compensation claims. |
| Enhanced Product Presentation |
Neatly packed items create a positive impression on customers and enhance the overall presentation of the product. |
| Cost Savings |
Lower breakage rates and reduced labor costs contribute to cost savings over time, improving the bottom line. |
| Customer Satisfaction |
Fewer damaged items and consistent packaging lead to higher customer satisfaction and potentially repeat business. |
| Sustainability Benefits |
Improved packaging reduces material waste and contributes to eco-friendliness, aligning with sustainability goals. |
Step#6 Filling and Securing the Box
After the boxes are prepared and the glass items are inserted, the next step is filling and securing the box. This step is crucial in ensuring the items remain stable and protected during transit. Here are the key elements of this phase:
Adding Filler Material
First, to prevent the glass items from moving or colliding during transportation, it’s important to fill any voids in the box. Materials such as packing peanuts or crumpled paper are ideal for this purpose. I’ve always leaned towards sustainable fillers, like recycled paper, to protect while being environmentally conscious.
Checking for Item Stability
Before sealing, it’s vital to check the stability of each item within the box. This involves gently shaking the box to ensure there is no movement of the glass items inside. If movement is detected, additional filler material is added. This step ensures that the items are immobile and secure, reducing the risk of damage during transit.
Applying Internal Stabilizers
Following checking the item stability, it is then before closing the box that internal stabilizers such as cardboard dividers or foam inserts, are added to keep the glass items firmly in place. This step is particularly important for ensuring that individual items or bundles don’t shift during handling and transport.
Step#7 Sealing and Labeling by the Machine
Once the glass items are securely packed and stabilized inside the box, the next crucial phase is sealing and labeling by the machine. Below are the key processes involved in this stage:
Automated Sealing
The first step is the automated sealing of the box. The machine applies a strong adhesive tape uniformly across all box seams. This method not only ensures a consistent and secure seal but also speeds up the packing process. In my experience, a well-sealed package is fundamental to protecting the contents during shipping, reducing the risk of damage due to box openings or tears.
Precision Labeling
Following the sealing, the machine precisely applies the necessary labels to each package. This includes shipping labels, barcodes for tracking, and handling instructions, such as “Fragile” or “This Side Up.” I’ve found that accurate and visible labeling is critical for efficient handling and routing during transportation, ensuring that the packages reach their destinations without any issues.
Application of Security Tapes and Seals
Finally, for added security and tamper evidence, security tapes and seals are applied. These materials provide an extra layer of protection, making it evident if a package has been opened or tampered with during transit. Implementing these security measures not only safeguards the contents but also instills confidence in the recipients about the integrity of their received goods.

Step#8 Final Checks and Quality Assurance
Following the sealing and labeling of the packages, the next critical step in the process is conducting final checks and quality assurance. Here are some essential aspects of this process:
Visual Inspection
The first step involves a thorough visual inspection of each package to ensure that the sealing is intact and the labeling is correctly applied. This includes checking for proper adhesive application and ensuring that all necessary labels are present and readable. I learned that this careful inspection is a crucial safeguard against potential shipping and handling issues.
Verification of Package Contents
Next, the contents of each package are verified against the packing list to ensure accuracy. This may involve scanning barcodes or manually checking the list. Ensuring that the right items are in the right box is fundamental to customer satisfaction and reduces the risk of returns or complaints. I’ve always stressed the importance of this step to maintain high customer trust and satisfaction levels.
Quality Control for Packing Standards
Finally, a quality control check is conducted to ensure that each package meets the set packing standards. This includes assessing the adequacy of cushioning materials, the stability of the items inside the box, and the overall readiness for shipping. This step is not just about preventing damage during transit; it’s also about upholding the brand’s reputation for delivering products in pristine condition.

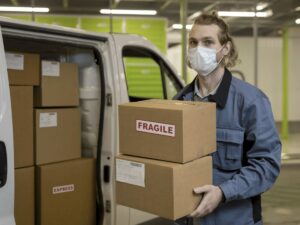
Step#9 Preparing for Shipment
After the final checks and quality assurance, the final step is preparing the packages for shipment. Here’s a breakdown of the key processes involved in this stage:
- Sorting and Organizing Packages: The first step involves sorting and organizing the packages based on their shipping destinations. This efficient organization is essential for smooth logistics and helps in quick loading and dispatch.
- Loading onto Transportation: Next, the packages are carefully loaded onto the designated transportation, whether it’s a truck, ship, or plane. It’s important to load the items in a way that maximizes space. I believe strategic loading can significantly reduce the risk of damage during transit.
- Final Documentation and Dispatch: Lastly, all necessary shipping documentation is completed and double-checked. This includes shipping manifests, bills of lading, and any customs paperwork for international shipments. Accurate documentation is necessary to ensure a smooth delivery process.
Dive Deeper Into Our Resources
For some insightful reads, we’ve curated a list of recommended articles just for you:
Still haven’t found what you’re looking for? Don’t hesitate to contact us. We’re available around the clock to assist you.
Conclusion
To sum it up, this comprehensive guide provides valuable insights and practical steps to ensure the safe packing and shipment of glass items. By following these detailed procedures, businesses can significantly reduce the risk of damage, enhancing client satisfaction and operational efficiency.
For specialized packing solutions and expert advice that aligns with your specific needs, consider Glassays as your go-to resource. Visit our website or contact us directly to explore our offerings or for future collaborations.